Tips and Tricks for Formatting Large Word Docs with Multiple Editors
June 2, 2023
Microsoft Word has lots of great features that have simplified the writing of documents for decades—all kinds and sizes of documents. But there’s a hitch when it comes to supersized documents.
Massive projects like book manuscripts, detailed requests for proposals (RFPs), standard operating procedures (SOPs), training manuals and handbooks, and lengthy white papers call for some extra planning up-front, especially when multiple editors are involved. And everyone must be on board with your plan, the client included.
First, take time to ensure that stylistic and structural elements are agreed upon by everyone who will be working on the document. Agree to the number of chapters in a book, the types and number of sections in a manual, and the types of headers, footers, indents, and borders for each section.
Next, establish a timeline for any changes to text or additions of pictures, tables, charts, or other graphic elements. This is even more important when using the handy collaboration and editing feature called Track Changes (more on this in the last section of this blog).
Tips to Keep Word Document Formats Consistent for Everyone
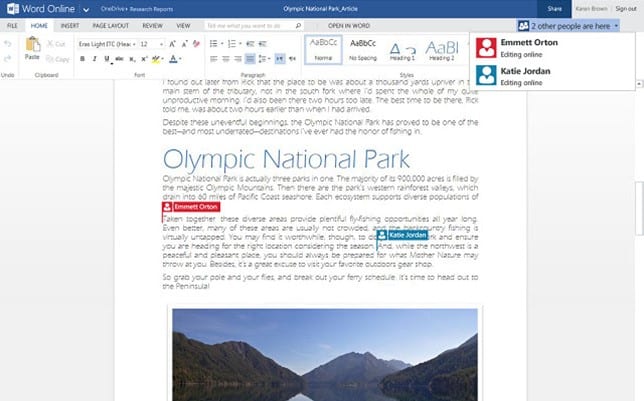
Use Word Online
Word Online functions use the familiar Word tabs and options, but your files are saved to the Cloud, so they are accessible online for you and anyone you share them with. No emails are necessary.

So, what are the advantages of Word Online for long documents?
When everyone involved uses Word Online throughout a lengthy project, the appearance of documents won’t change on different-size computer screens. No strange, unwanted white spots will suddenly pop up to create confusion and extra work, as they might if some of the editors used another software.
Another important advantage of Word Online—especially when you plan to add creative elements and your desired end product is a PDF— is that Word imports easily to Adobe. PDF is described as the “native file format” of the Adobe Acrobat family of products.” Adobe enables illustrations, artwork, manipulation of photos, animation, and more—features that can greatly enhance your results.
Make and use a template
The next crucial step after deciding to use Word Online is to make and attach a template to your Word Online document. This template will incorporate your agreed-upon fonts and font colors, margins, paragraph spacing, and borders.
First, using your computer’s Word software (NOT Word Online), pick a style on the Design tab. You can use a preset style or modify one by choosing colors, fonts, paragraph style, borders, and other options. Save your style as a New Style Set. Alternatively, if you have a page of text formatted according to agreed-upon preferences, you can select it to create a new style, and save that as a New Style Set.
Now, using a new blank document, create a sample page of text in your chosen style and save it. You will use this page to create your template. The simple process to do this and to use your template with Word Online is found here, with illustrations.
Use page breaks

Long documents will typically contain some partially full pages.
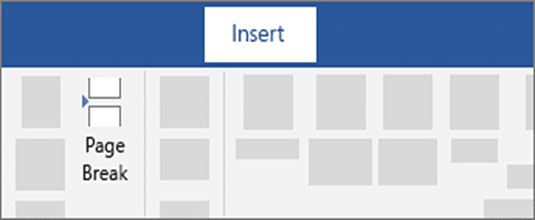
To keep page divisions in your document consistent from computer to computer, use page breaks. This is easy; when you come to a spot in your document where you need to start a new page before you get to the bottom, hit “Ctrl, Enter” to create a page break. That’s it.
Break up long projects into separate docs, and run a test
It’s much easier to work on a monstrously long project when you break it up into separate Word documents. These will likely be chapters for books or manuals and topical sections (each of which may require its own template) for other projects.
In “Tips for Managing Large Microsoft Word Documents,” Melissa Palmer writes, “Breaking things into smaller documents will make things load faster, scroll better, and all around make your life happier during your Word work.”
Kathleen Rinchiuso of The Writers for Hire also recommends running a test by combining two documents that are at least somewhat complete at the beginning of a project. This, she says, will help detect any issues that might arise during the combining process before a formatter tackles the “big, giant process at the end.”
Using “Track Changes” with multiple editors on formatted Word documents

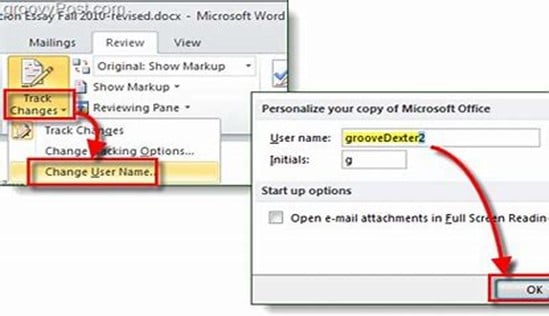
The “Track Changes” function (accessed on Word’s Review tab) is very useful for allowing comments and changes to be made by multiple editors (or “authors”). That said, you will want to use Track Changes in ways that help rather than hinder your large project.
When using Track Changes on your long documents, it is best not to add pictures and other graphic elements until all your Track Changes editing requests have been resolved. If you try to add images before resolving the edits, your formatting can be disrupted because Track Changes introduces extra lines within your text. While you are tracking changes, just put in a small marker of some sort to indicate where a particular image will be inserted.
If there is a need for further comments to be made after images are introduced, they can be made outside the margins in comment boxes. Getting all parties to agree to this order of events before work on a document begins can save significant time and headaches.
With multiple editors, especially when a document is long, it’s also helpful to use different colors for different editors’ remarks and changes. The Microsoft article titled “Change the Track Changes Color” tells you how. After setup, you can choose to look at all or only one author’s comments at a time.
On a very large project, there may be many Word documents that will be combined in a PDF for final formatting. It’s essential that all “Track changes” comments and other comments have been removed before the combining happens.
The formatter will appreciate a clean copy of each document that is part of your overall project. Once formatted as a PDF, the formatter can apply your agreed-upon headers, footers, page numbers, and any other remaining elements
Avoid “moving pictures” when formatting Word documents

When creating and sharing Word documents, especially huge ones, take steps to anchor your images near their related text. Unless you do this, they may annoyingly end up somewhere you don’t want them, adjacent to unrelated text. So just click on the icon on at the picture’s top left corner after inserting it and choose “Fix position on page” as your alignment choice.
While on the topic of making your pictures behave, let’s look for a moment at image layering, which is useful for inserting shapes containing text within your images to highlight various elements of your image. You might also want to layer a smaller picture within a larger one.
If you then group your image with all its layered images and caption, should you want to move them, you can simply move the group rather moving than each piece individually.
To group them, click on one of your images, hold down the Shift key, and click each image to be grouped. Then right-click and choose “Group.” You can now move the group of images with its caption as one unit—a time saver on a long document when you are working with multiple layered images. You won’t lose any of the elements in the moving process, either.
If you ensure that everyone is on the same page with each element covered here before you begin writing, HUGE Word document formatting with multiple editors can go much more smoothly.


